Operations Section
We will now explain the screens available under the Operations section in the application.
1️⃣ Shipments Receiving
When clicking on the Shipments Receiving , the shipment receiving process begins.
Steps:
-
Select the Courier.
-
Enter shipment numbers using one of the following methods:
- Manually entering shipment numbers one by one.
- Pressing the Camera button to scan the QR code or barcode for multiple shipments.
-
After adding all shipments, click Receive to complete the process.
Note Use the Camera to scan QR / Barcode. Press the green button to confirm. Use the Keyboard button for manual input.
2️⃣ Assign to Driver
This screen is used to assign shipments to couriers.
Steps:
-
Select the Branch.
-
Select the Courier.
-
Add shipment numbers by:
- Typing the shipment number in the designated field.
- Or scanning the barcode using the Camera button.
-
Click Save.
-
A confirmation warning message will appear.
-
After confirming, a posting confirmation message will appear indicating the operation was successfully completed.
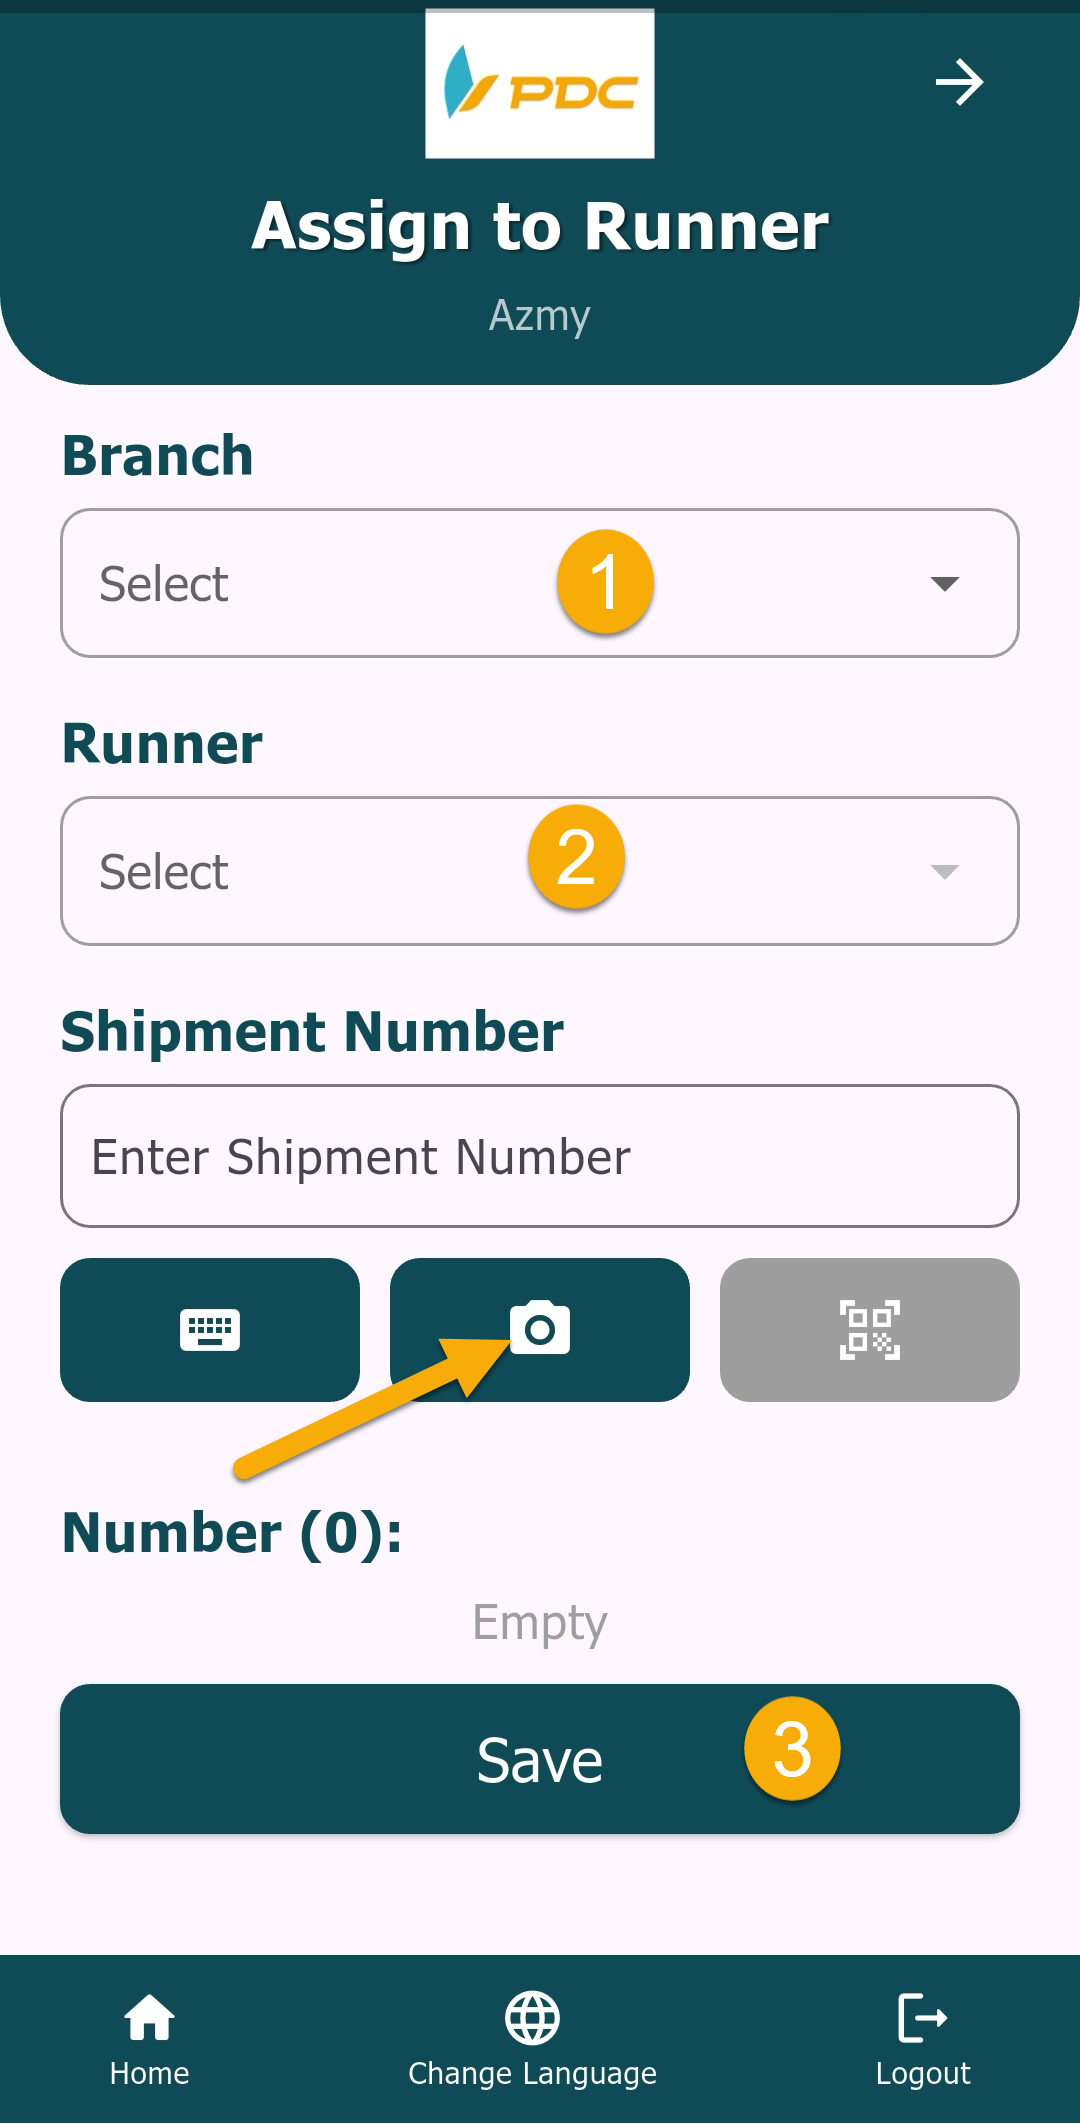
Note Use the Camera to scan QR / Barcode. Press the green button to confirm. Use the Keyboard button for manual input.
3️⃣ Return Shipments to Shipper
This screen is used to return undelivered shipments to the shipper.
Steps:
-
Enter the shipment number:
- Either manually.
- Or by scanning the barcode using the camera.
-
Click Save.
-
Then click Post to complete the process.
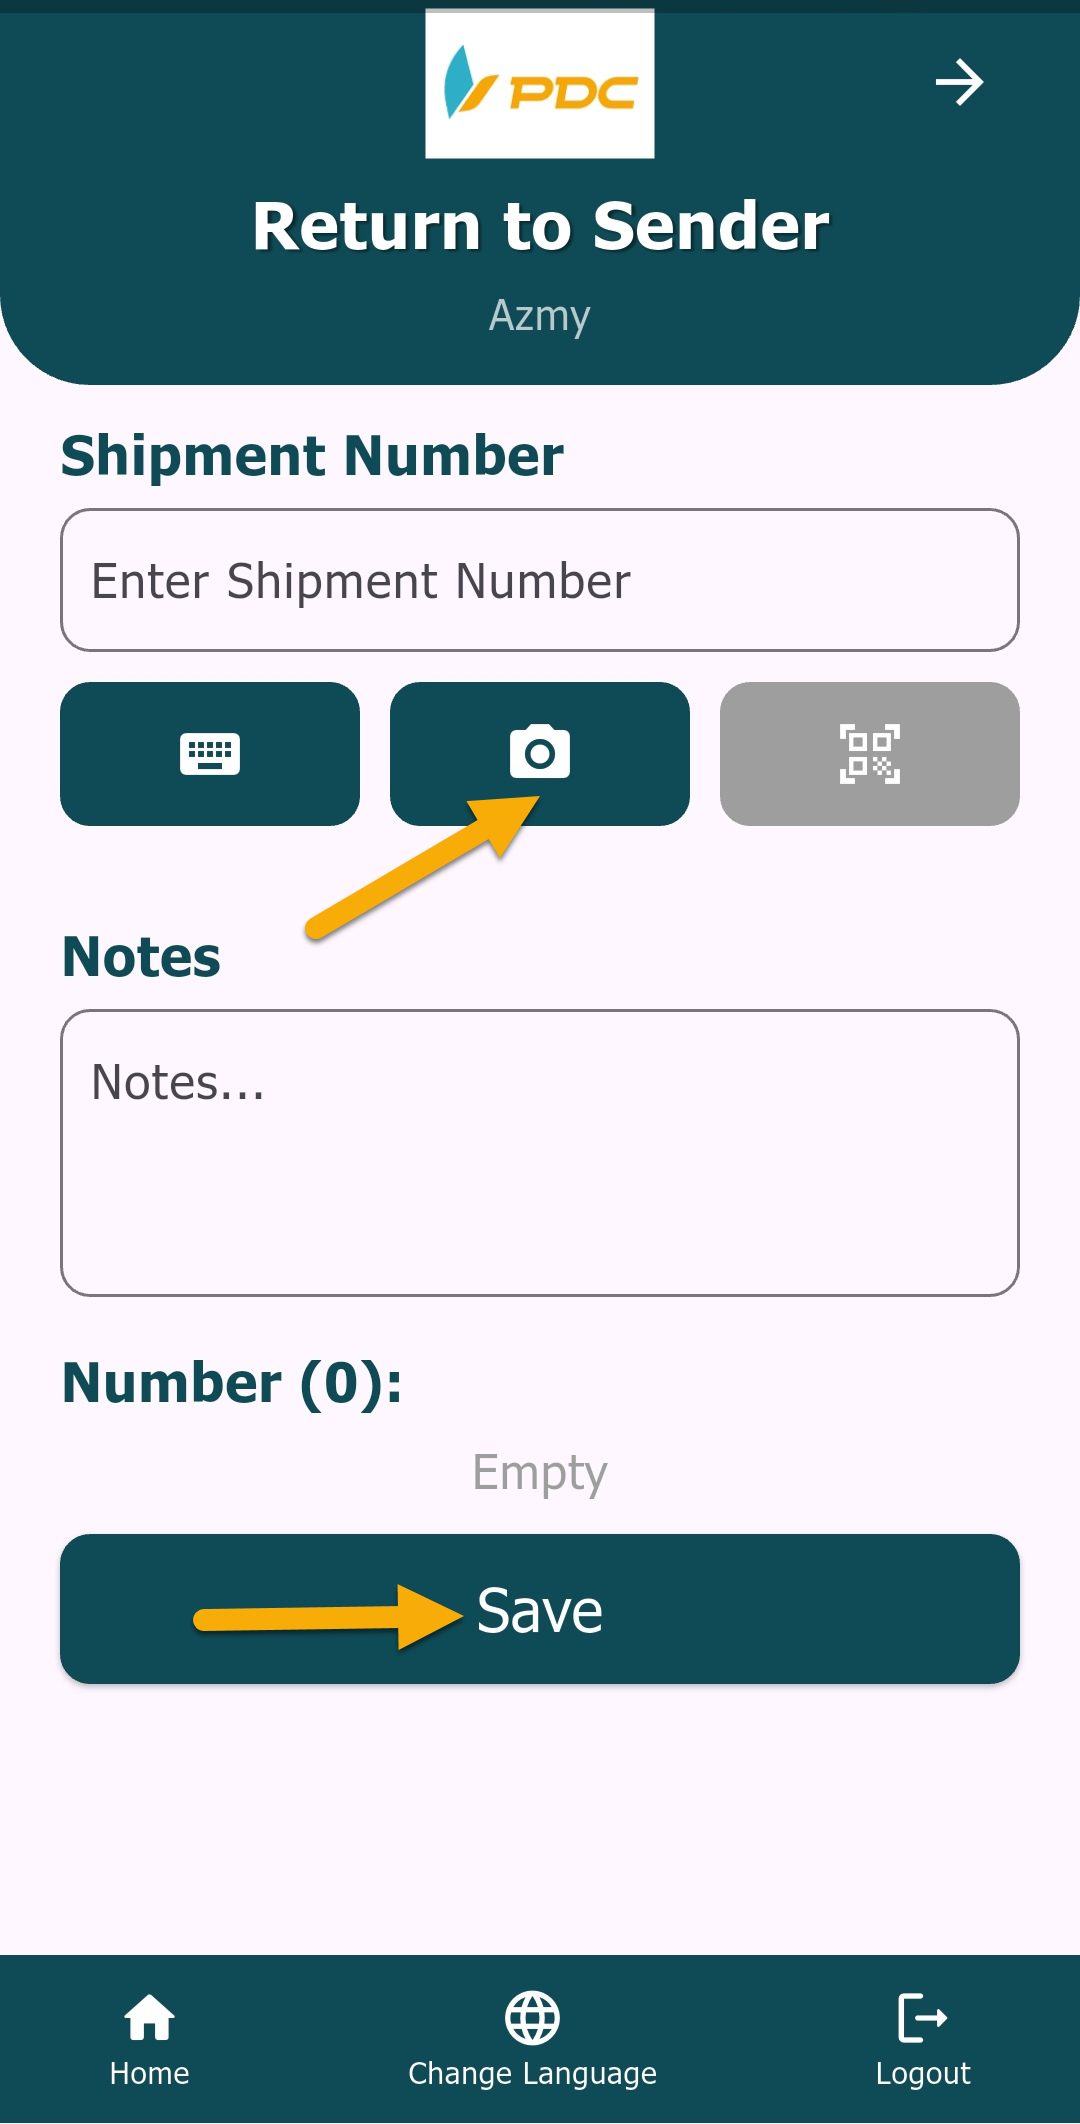
Note Use the Camera to scan QR / Barcode. Press the green button to confirm. Use the Keyboard button for manual input.
4️⃣ Re-operate Shipments
This screen allows changing the shipment status to Re-operate, so the shipment can be processed again.
Steps:
- Enter the shipment numbers.
- Click Re-operate.
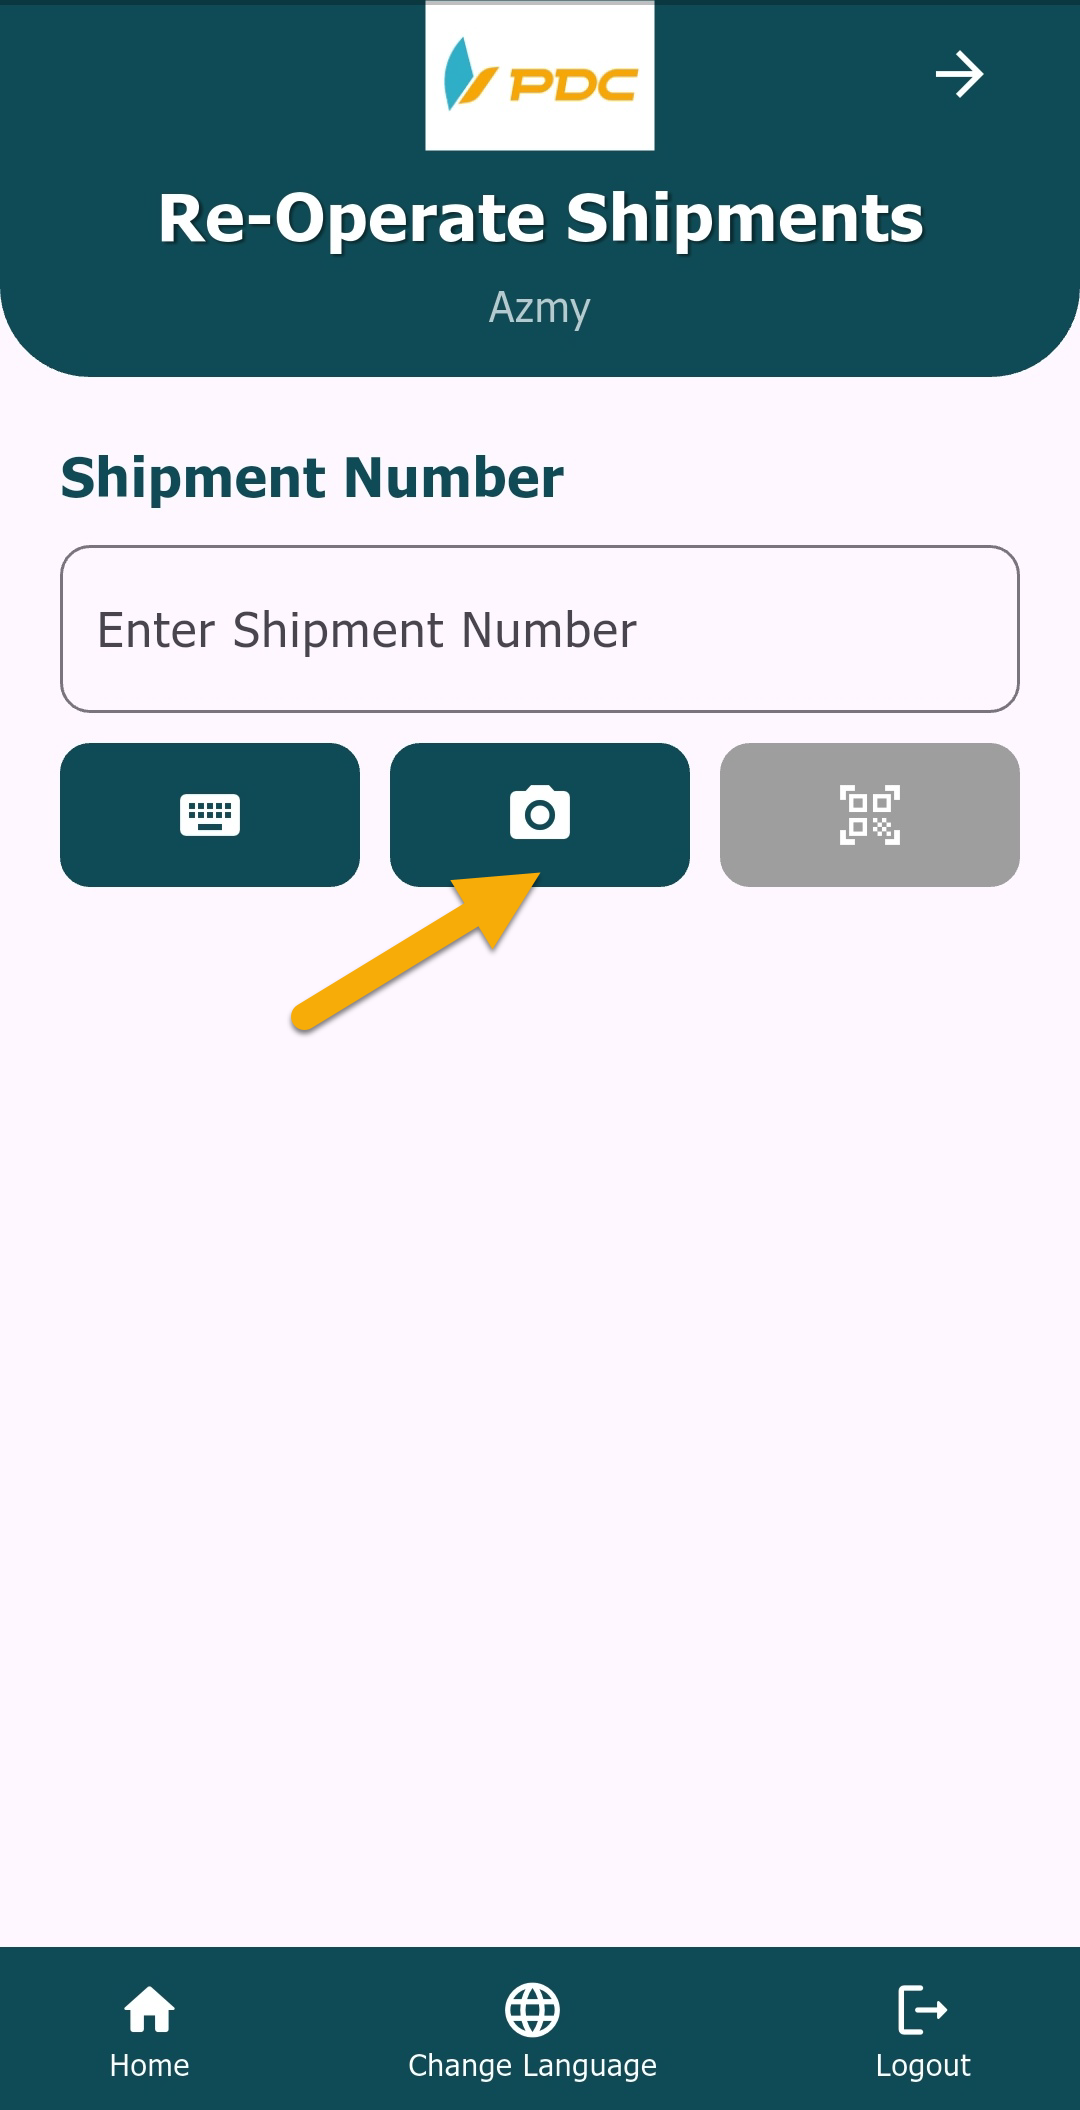
Note Use the Camera to scan QR / Barcode. Press the green button to confirm. Use the Keyboard button for manual input.
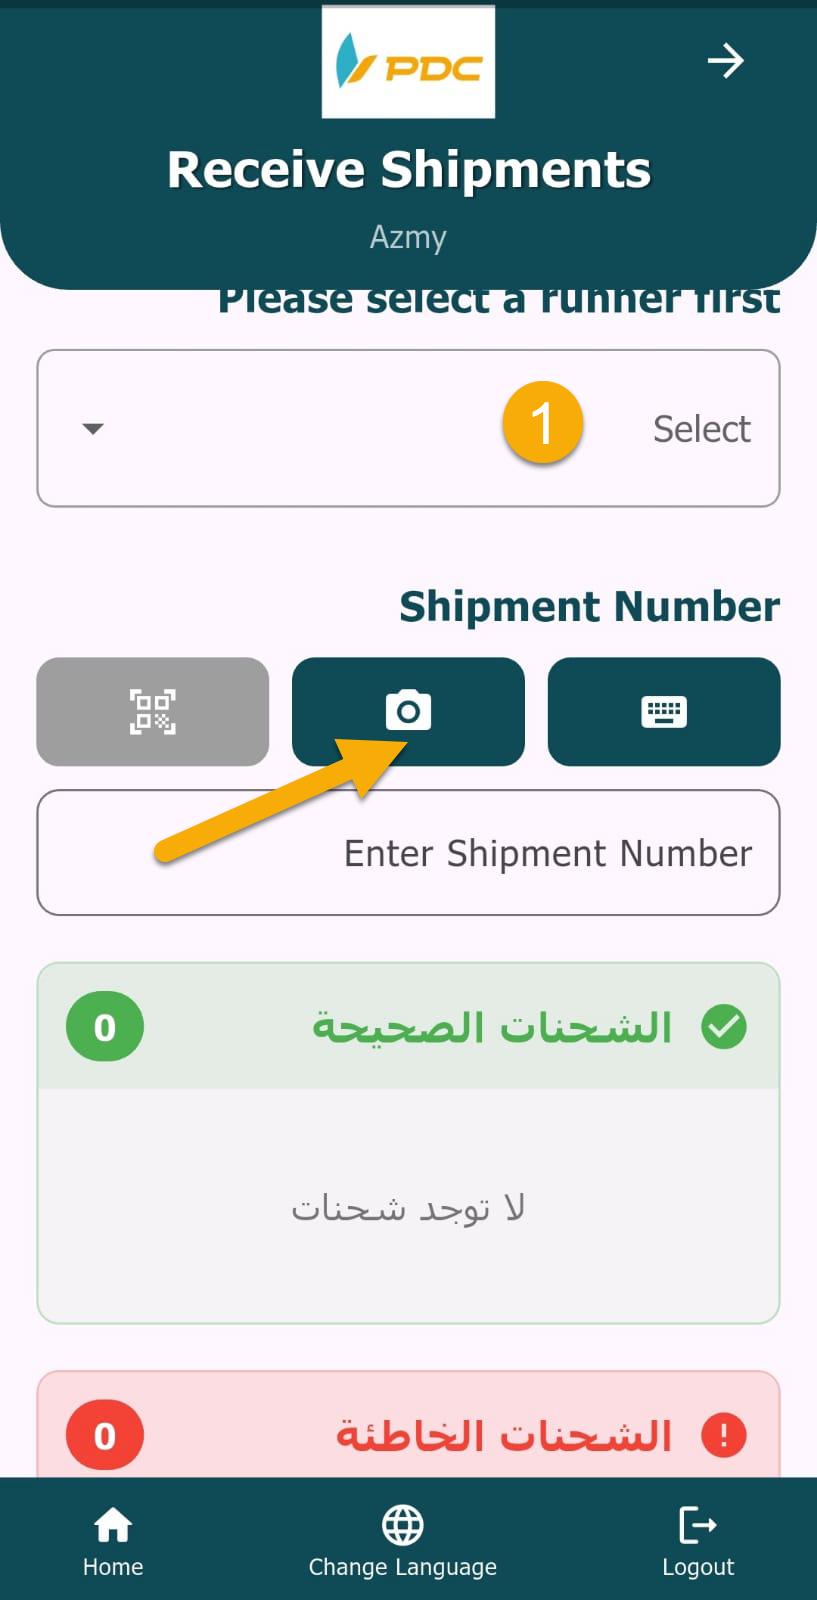
5️⃣ Courier Return (Courier Returns)
This screen is used to receive shipments that were not delivered by the courier. The branch (warehouse) employee confirms receiving these shipments from the courier.
Steps:
-
Select the Courier.
-
Click on Shipments.
-
The courier’s shipments will appear under:
- Not Delivered
- Or Partial Delivery (depending on shipment status).
-
To find a shipment faster:
- Enter the shipment number in the search field.
- Or scan the QR code using the camera.
-
After selecting the shipment, the employee can:
- Click Confirm Receiving
- Or Create Return Shipment.
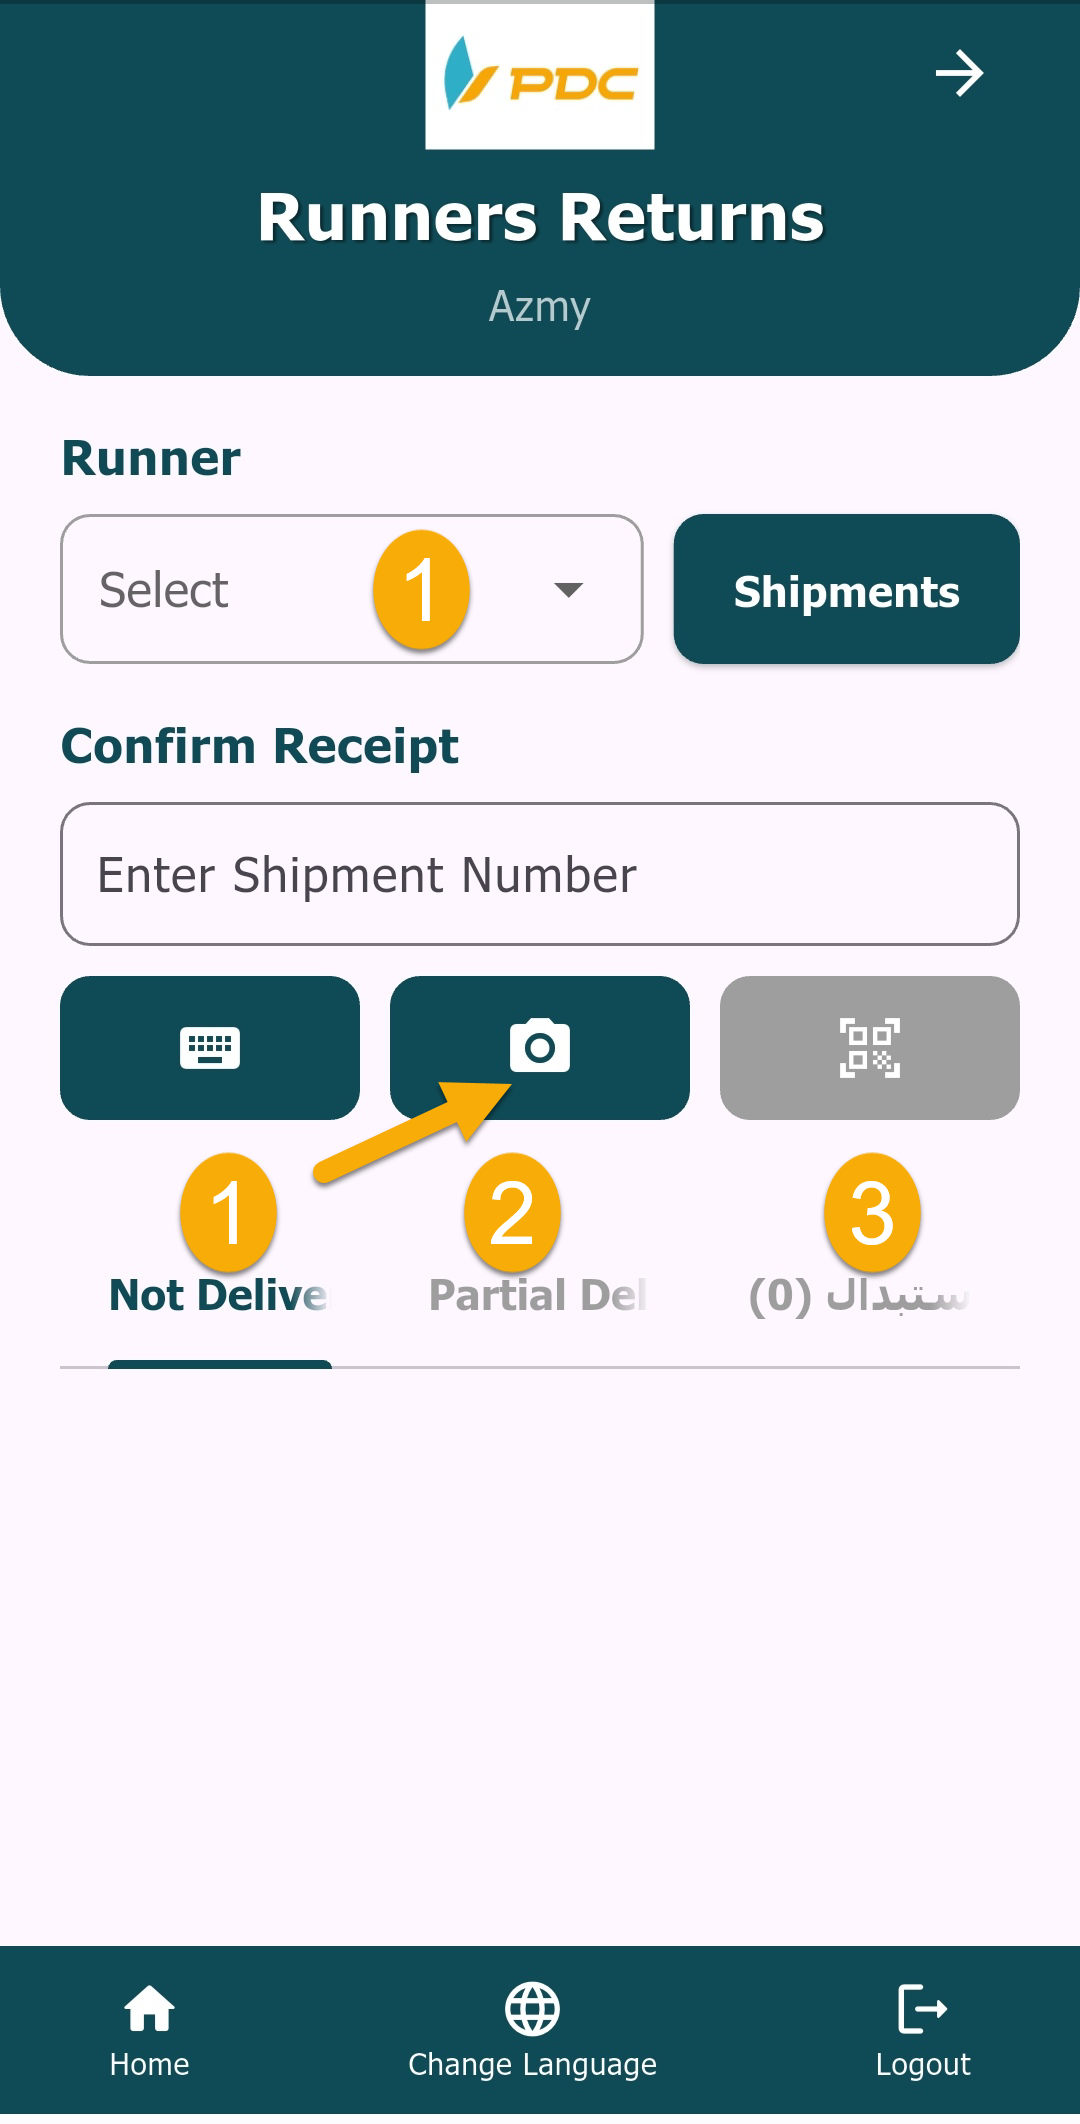
Note Use the Camera to scan QR / Barcode. Press the green button to confirm. Use the Keyboard button for manual input.
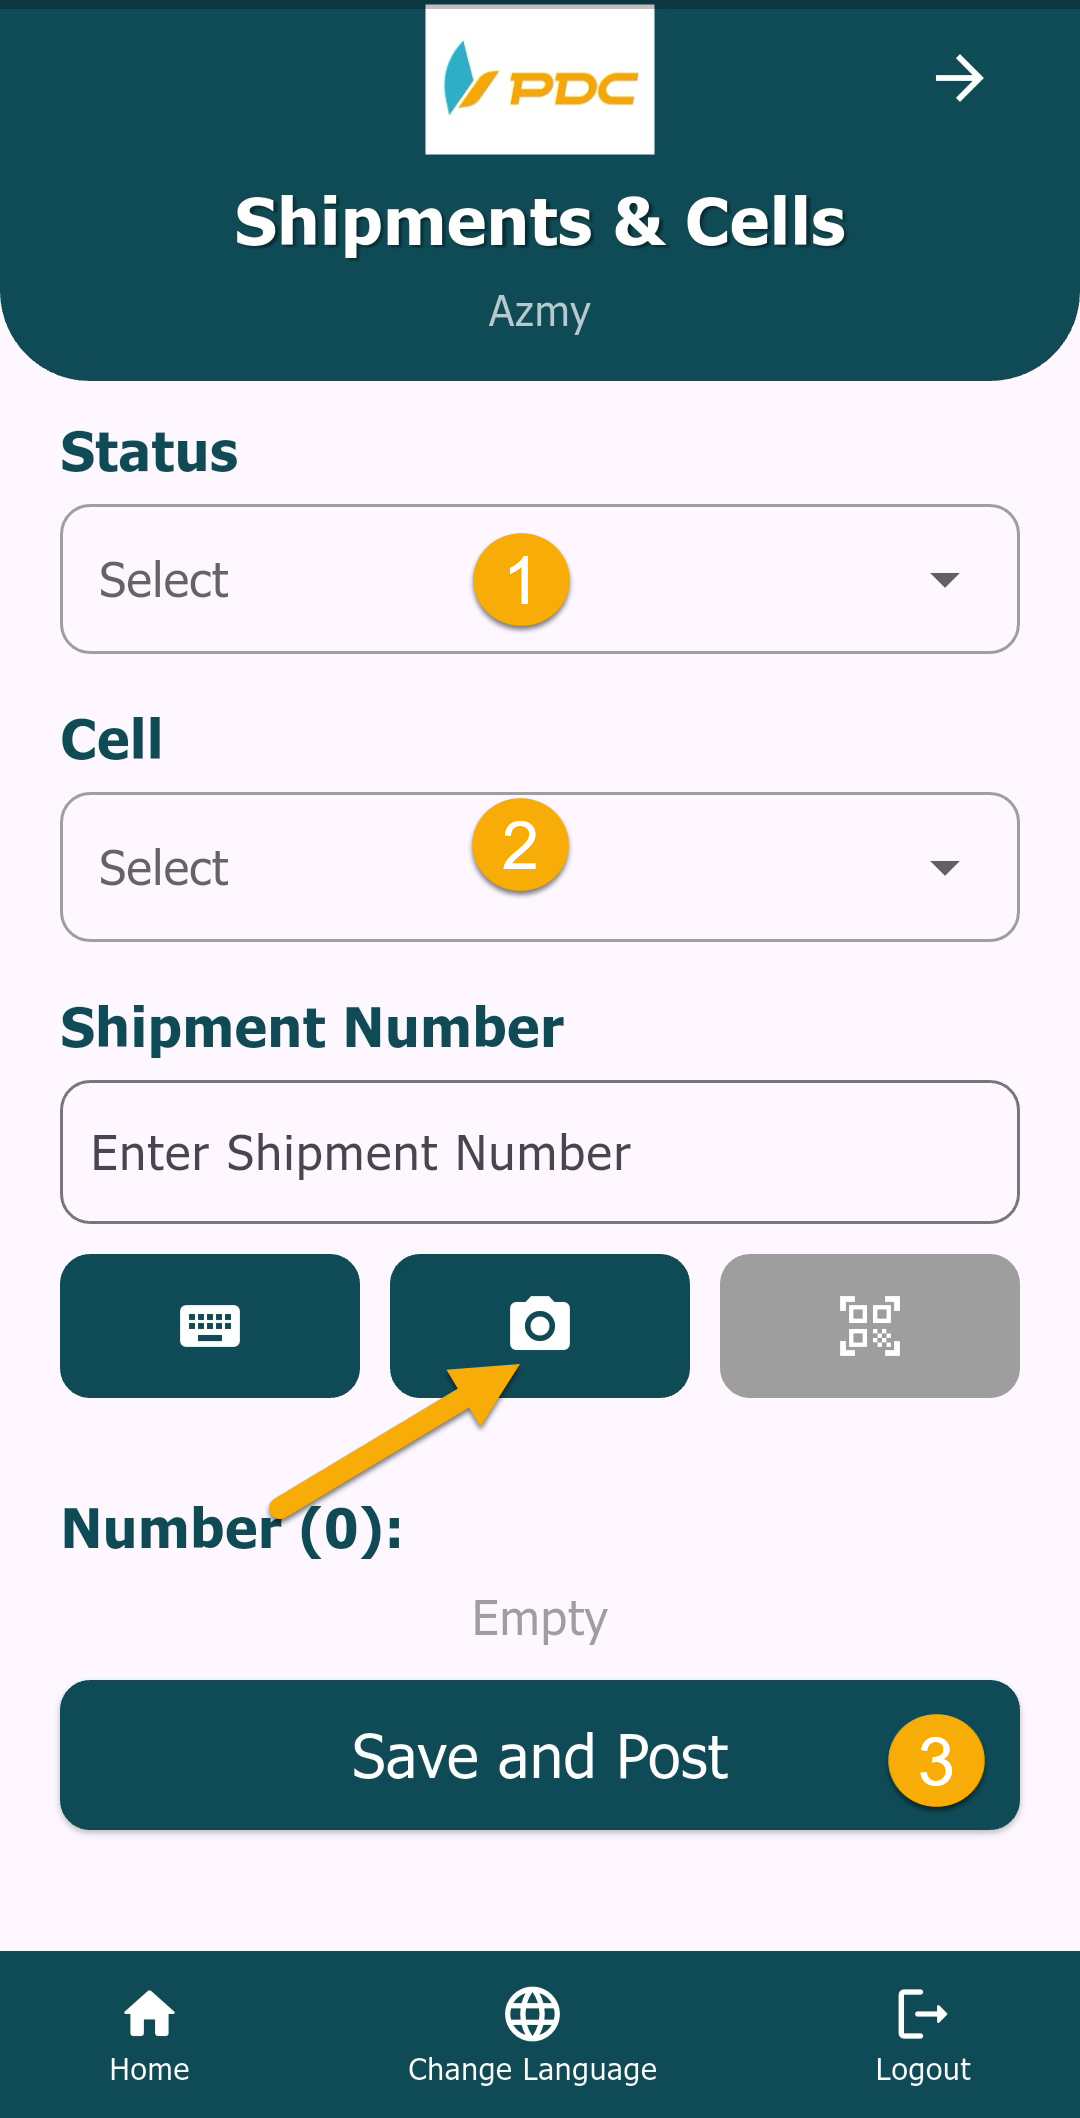
6️⃣ Shipments & Cells
This screen is used to organize shipments into specific storage cells inside the warehouse.
Steps:
- Select the Shipment Status.
- Select the Cell where the shipment will be placed.
- Enter the shipment number.
- Click Save.
- Then click Post to complete the process.